The v2.0.0 upgrade installs a default password policy by inserting a
row into cypex.t_config with key password_policy. This page documents
the policy, how to verify it on your instance, and how to override it.
This is very permissive by design. The rationale is that shipping a
working default is preferable to locking existing users out at upgrade
time. Once the upgrade is complete, administrators should review the
policy and tighten it to match their security requirements.
This page is the admin-panel entry point for the Organizations screen. The full
conceptual and procedural documentation lives in
Organizations. This page covers the GUI
surface and what an operator can change there.
In CYPEX, an Organization is the unit of multi-tenancy. It is the data
boundary that decides which rows a user can see, insert, update, or delete.
Organizations are not an authorization system on their own — they add a
per-request data scope on top of the existing PostgreSQL role-based
capability model. Both dimensions must agree before a row is returned. See
Capabilities vs data scope.
The v2.0.0 migrations are forward-only. There is no automatic rollback
script. This page documents what you can and cannot undo if you need to
revert the upgrade.
What you can roll back
Disable RLS on tenant-scoped tables
For every table that had RLS enabled by the v2.0.0 upgrade:
Looking for the conceptual reference (“what is an Organization?”)?
See Organizations.
After the v2.0.0 upgrade, every CYPEX deployment starts with a single
Default Organization that holds all existing data. This page is the
entry point for setting up additional organizations and assigning existing
clients / schemas to them.
When to read this
You want to split a single-tenant deployment into multiple organizations
(one per client, per business unit, or per environment).
You need to backfill the organization_id column on existing
application-schema tables.
You are operating the cutover from “everything on Default Organization”
to “each row tagged with the right organization.”
Schema Access decides which PostgreSQL schemas an organization may use. It
is the coarsest of the three access controls in v2.0.0 and it sits above the
other two: an organization that has not been granted a schema sees nothing in
it, regardless of role capabilities and regardless of what the RLS policy would
have allowed.
Sidebar location: Access Control → Advanced (System admin) → Schema Access.
This page is System Administrator only (system admin visibility). An
Organization Administrator cannot grant their own organization a schema — by
design, since doing so would let a tenant widen its own boundary.
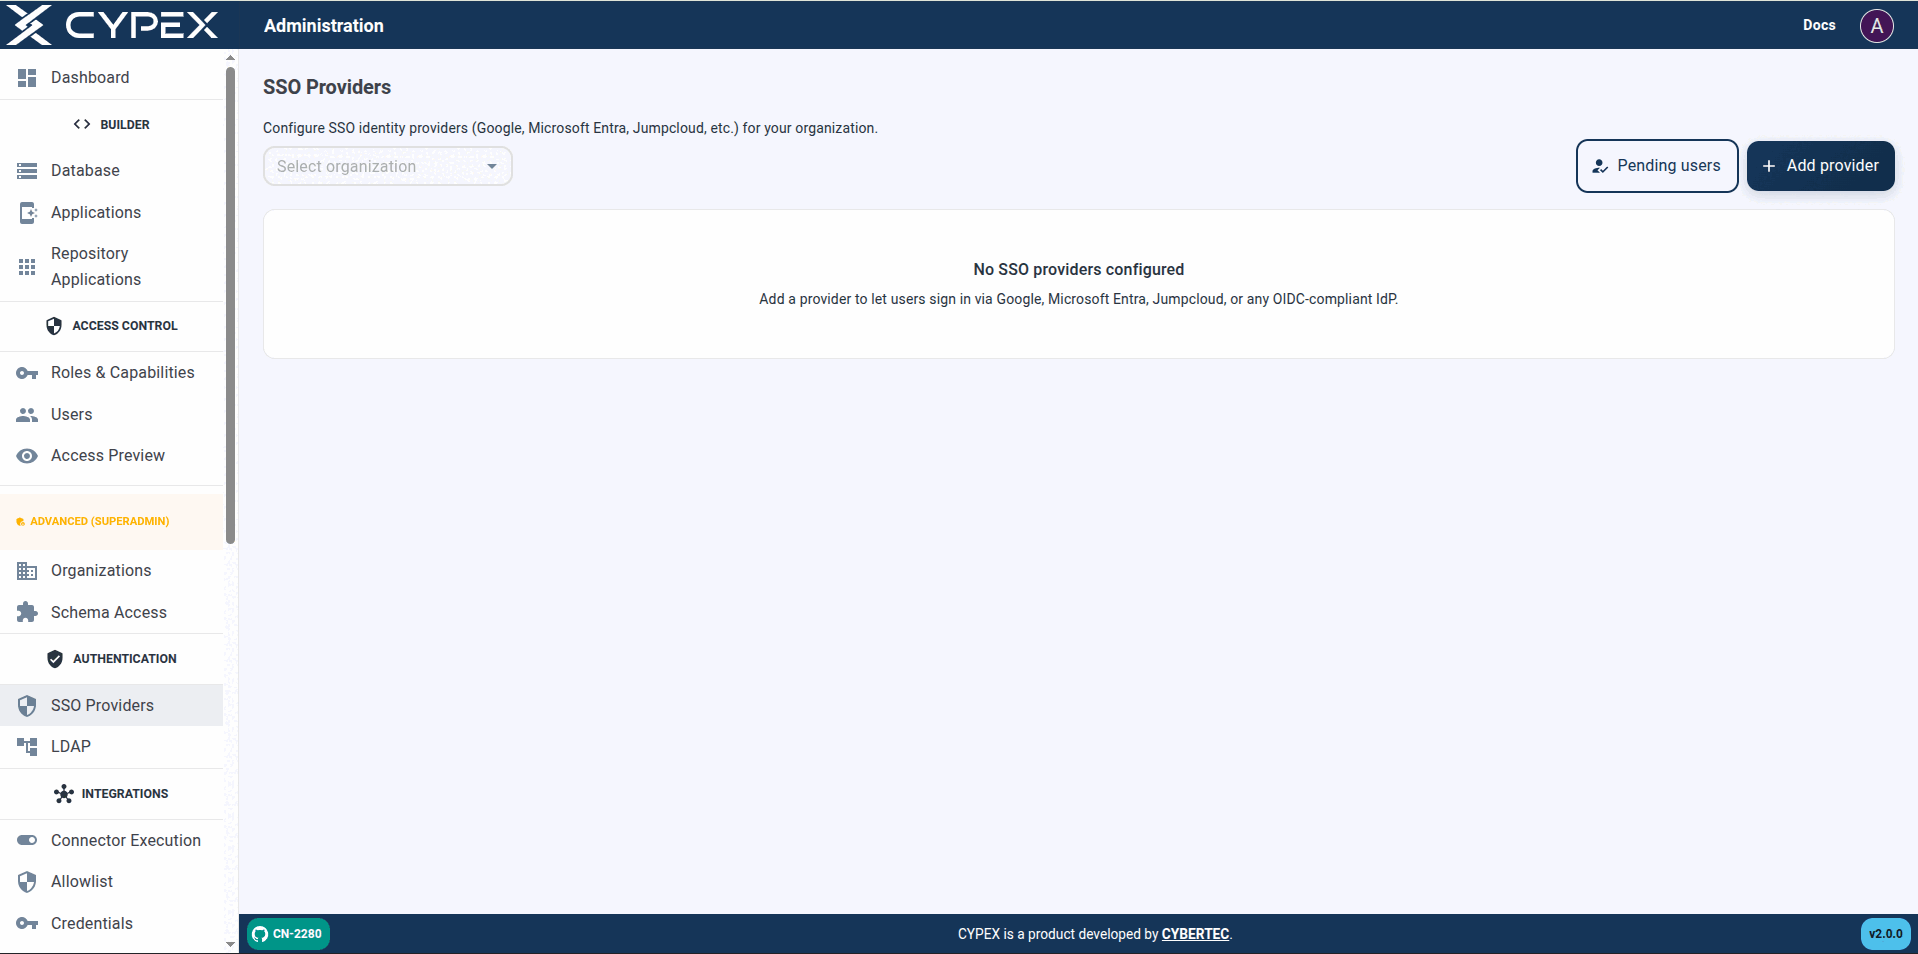
Under Authentication → SSO Providers, this page configures which identity providers can sign users into an organization. For the full hands-on walkthrough — adding a provider, signing in, and approving the first user — see the OIDC setup guide.
SSO Providers
Select an organization, then Add provider. Pending users opens the same approval queue as Users → Pending SSO.
List screen
Filter by Organization — defaults to All organizations. With no
organization selected in contexts that require one: Select an
organization / Pick an organization above to list its SSO provider
configurations.
Pending users — opens the approval queue (same as Users → Pending
SSO).
Add provider — disabled until an organization is selected in the filter
when the create flow requires one (Select an organization in the filter
above before adding a provider.).
Empty list — No SSO providers configured / Add a provider to let
users sign in via Google, Microsoft Entra, Jumpcloud, or any OIDC-compliant
IdP.
Table columns — Name, Organization, Type, Client ID, Status, Last used,
Actions. Status is Active or Disabled; Last used shows Never
until the first successful sign-in.
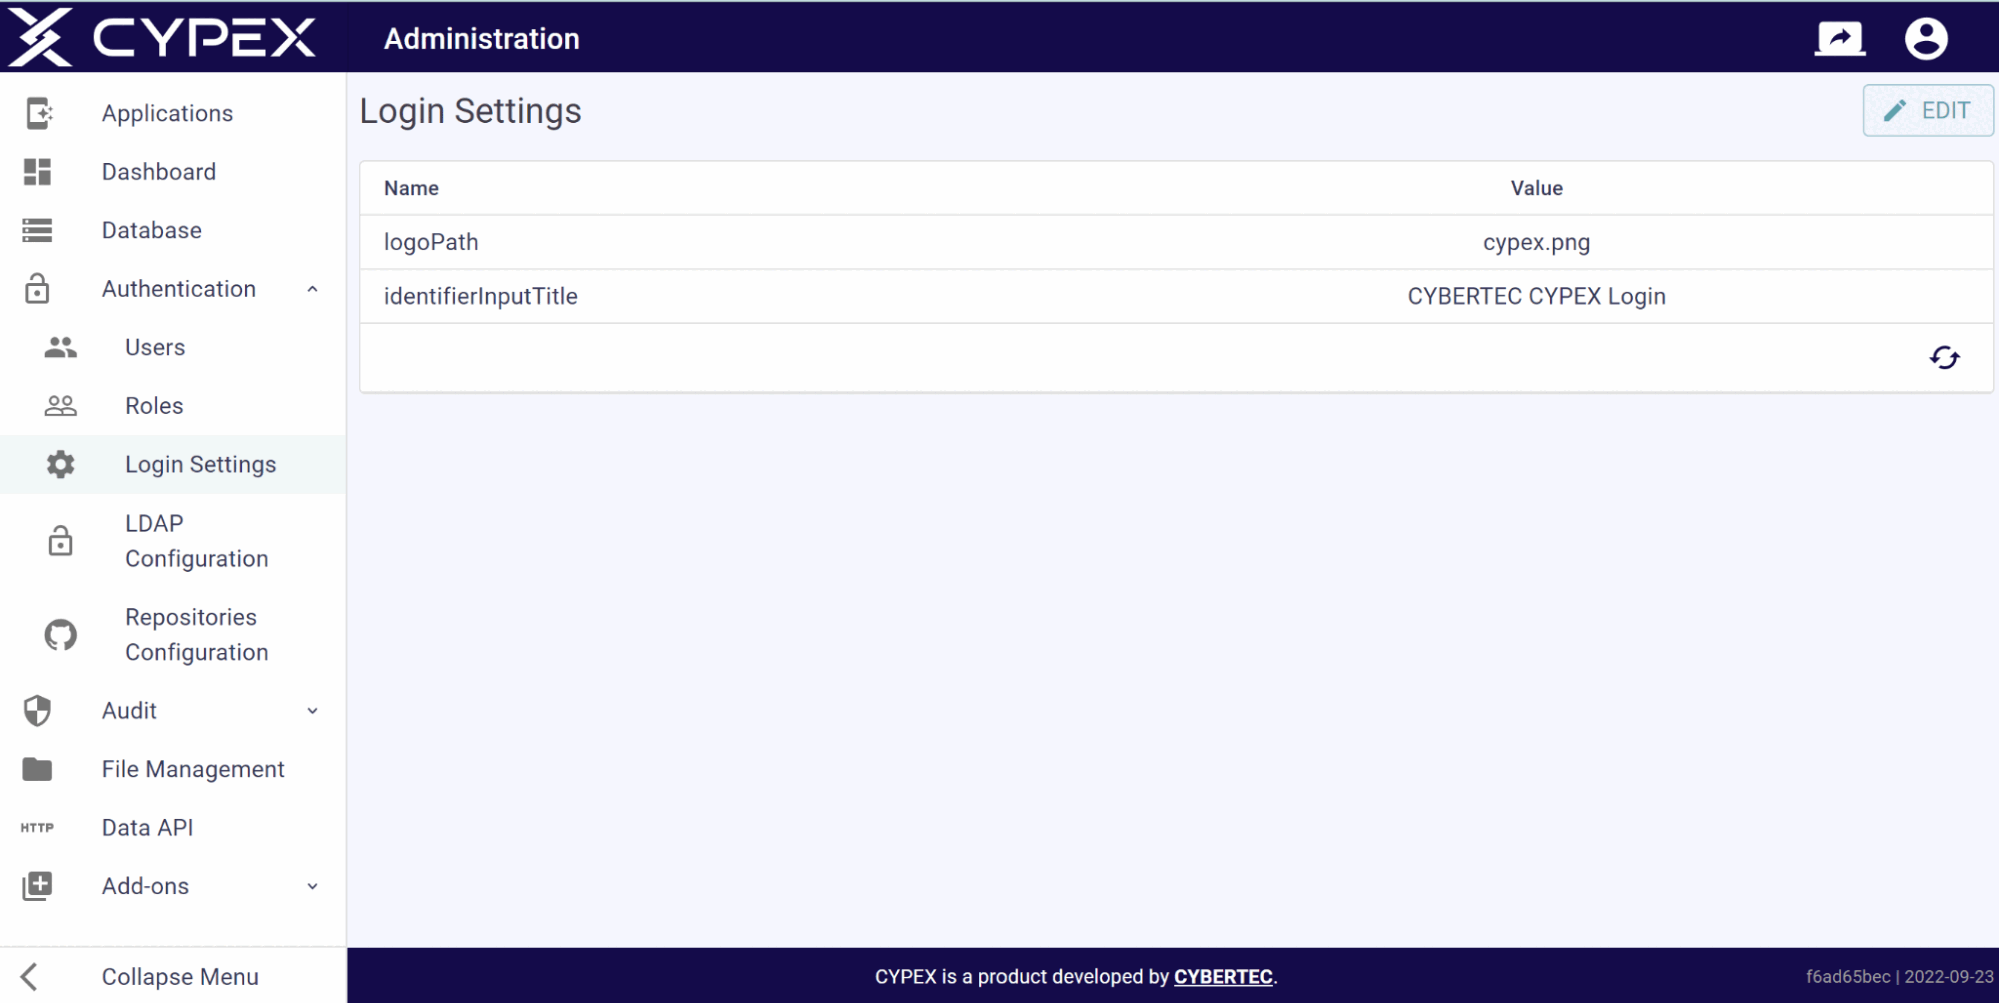
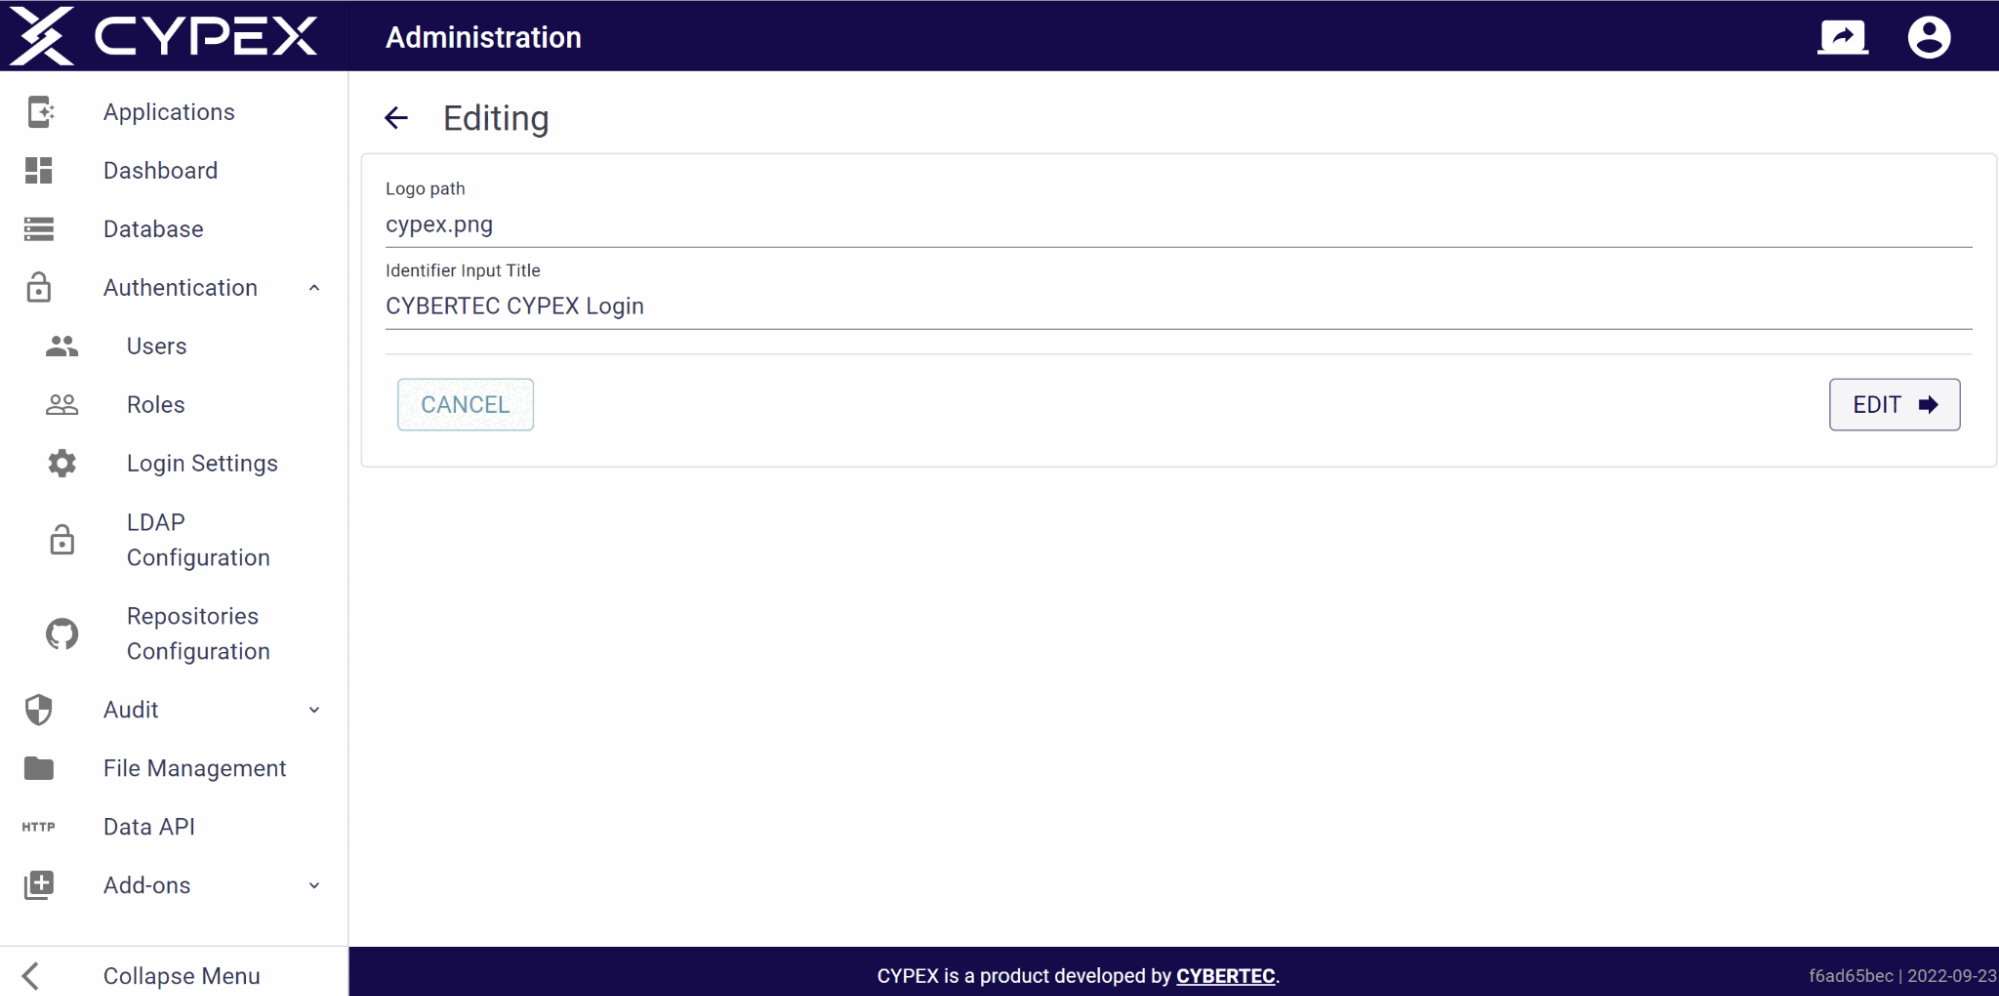
In Login Settings you define the logo shown during login:
You can upload any suitable logo and easily change the name of the page to adjust CYPEX to your company CI’s needs. Note that the logo you are pointing to has to be in the public folder of your webserver:
These settings directly translate to the way the start page looks. The following screenshot shows what the default layout is like in the standard configuration shipped to customers:
Under Integrations → Connector Execution, the page heading is Connector
Execution Rollout. It is a two-step kill switch for connector execution.
Everything is off by default — connectors only run in an organization when
platform-wide execution is on and that organization is included in the
rollout:
Info
Enterprise licence required. Integrations is gated on an active enterprise licence. Without one the section does not appear in the admin sidebar, regardless of the signed-in user’s role.
Under Integrations → Allowlist, the page heading is Connector
Allowlist. It is the set of hosts outbound connectors are permitted to call.
Connectors cannot reach any host that is not allowlisted — this is enforced at
runtime, not just validated at save time:
Info
Enterprise licence required. Integrations is gated on an active enterprise licence. Without one the section does not appear in the admin sidebar, regardless of the signed-in user’s role.
Under Integrations → Credentials, the page heading is Connector
Credentials. Credentials are encrypted at rest and referenced by connectors
by name — never inline. They are write-only: the plaintext value is never
shown again after saving:
Info
Enterprise licence required. Integrations is gated on an active enterprise licence. Without one the section does not appear in the admin sidebar, regardless of the signed-in user’s role.