CYPEX federates login to an external identity provider in two ways. OIDC and OAuth2 logins go through a standalone SSO Gateway service; LDAP is handled inside CYPEX itself and does not involve the gateway. Both paths end the same way: a successful federated login issues a PostgREST-compatible JWT, and the organization and role claims on that token drive the same PostgreSQL Row-Level Security (RLS) policies as local username/password auth. There is no separate SSO security path.
This is the conceptual / architecture reference. For the hands-on, step-by-step walkthrough with screenshots and a real sanitised request/response, see the Setup guide. For the admin-panel GUI reference (screenshots, field-by-field), see Connectors, Connector Secrets, Connector Allowlist, and Connector Enablement.
Pages in this section
This page — the conceptual / architecture reference.
Setup guide — the hands-on E2E walkthrough: rollout, allowlist, credentials, the guided builder, publish, execute, and audit.
A Connector is a governed, server-side definition for calling a third-party REST API and mapping its response into a typed shape a CYPEX application can render — an authenticated CYPEX user’s page can show a table backed by a live external API call, next to tables backed by CYPEX’s own PostgreSQL data.
A change that affects a tenant boundary should be reconstructable afterwards.
CYPEX records part of that automatically and leaves the rest to you. This page
documents the three layers where evidence lives, in order of increasing
persistence:
The permission audit log — queryable in PostgreSQL.
The write path — what CYPEX captures automatically, and what it does not.
Documentation approvals — recorded in product docs and release notes.
If you make a non-trivial decision about an Organization (split, merge, role
remap, schema revoke), keep the audit query and its output with the change
record, and add an ADR-style note under
CYPEX internals.
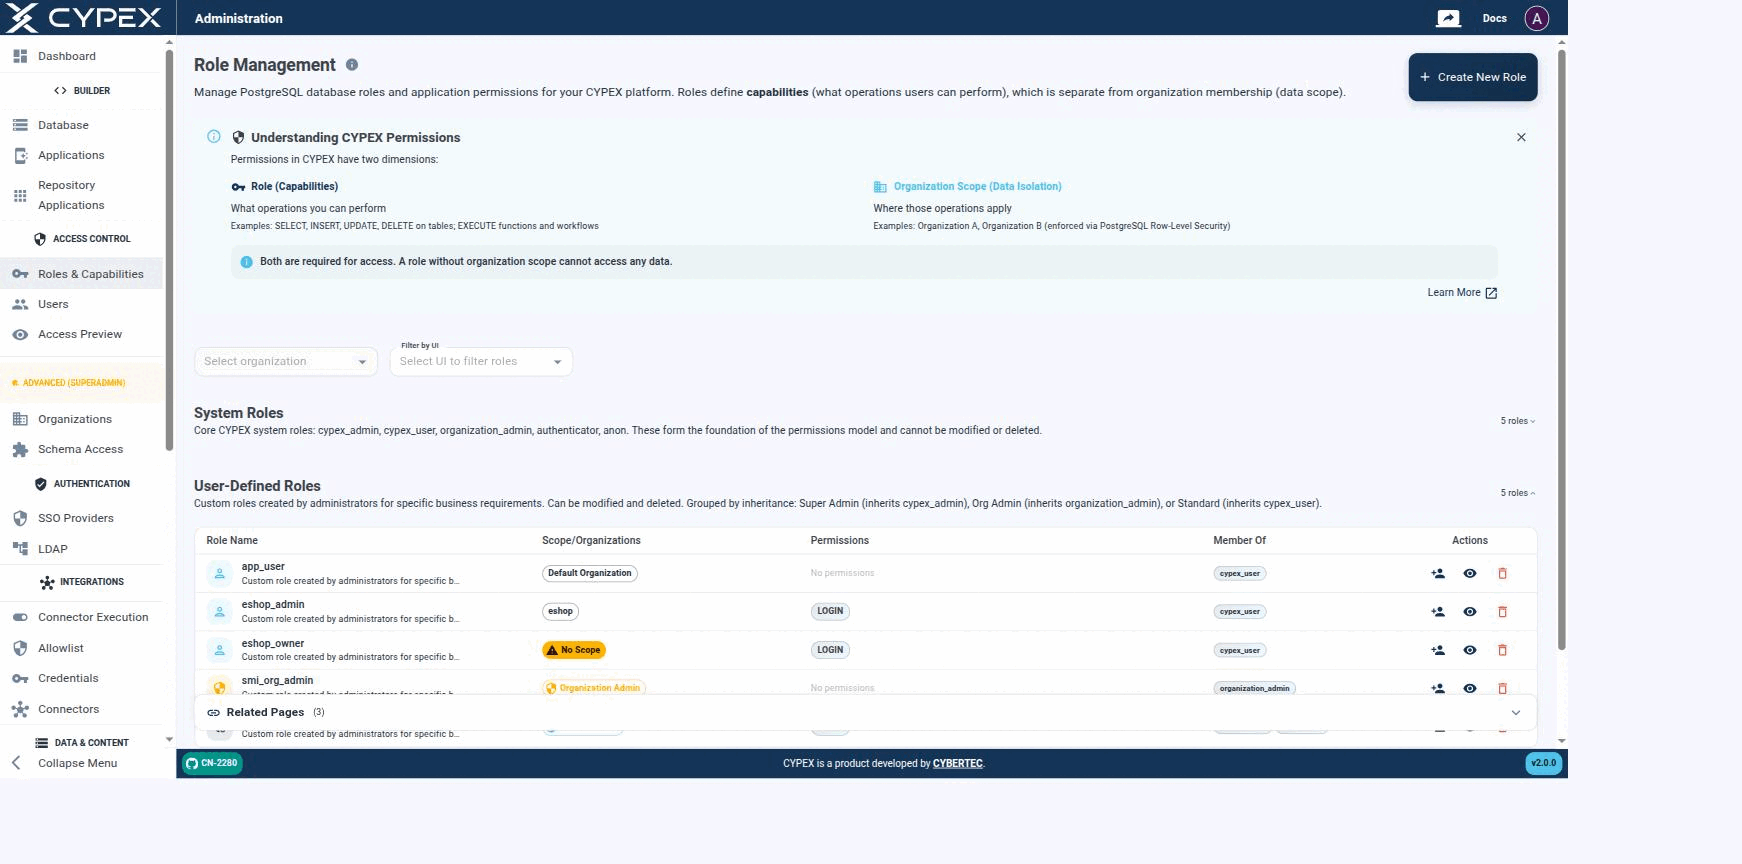
The next important step is to define roles. Remember, roles are connected to CYPEX users and represent real database-side users. Role Management lets you manage PostgreSQL database roles and application permissions for your CYPEX platform:
Role Management
Roles define capabilities — what operations a user can perform — which is a separate concern from organization membership, the data scope those operations apply to.
Roles vs Organizations
Permissions in CYPEX have two independent dimensions, both required for access:
This page lists the upgrade scenarios that were exercised against the v2.0.0
migration scripts, the result of each, and the explicit answer to the most
common question: does RLS change row visibility for existing single-tenant
data?
Short answer
Info
No. RLS does not change row visibility for existing single-tenant data.
All existing rows remain visible to all existing users after the upgrade.
The mechanism is described in detail on
RLS impact on existing data. The short
version: the upgrade creates a Default Organization, maps every existing
role to it, and the RLS policies explicitly allow organization_id IS NULL
rows to be visible. Existing single-tenant data therefore continues to be
readable.
This page answers the most common question about the v2.0.0 upgrade:
Info
Does enabling RLS change row visibility for existing single-tenant data?
Short answer
No. Existing single-tenant data remains visible to all existing users
after the upgrade. The migration is designed so that the transition from
v1.x to v2.0.0 is transparent for end users at the row-visibility level.
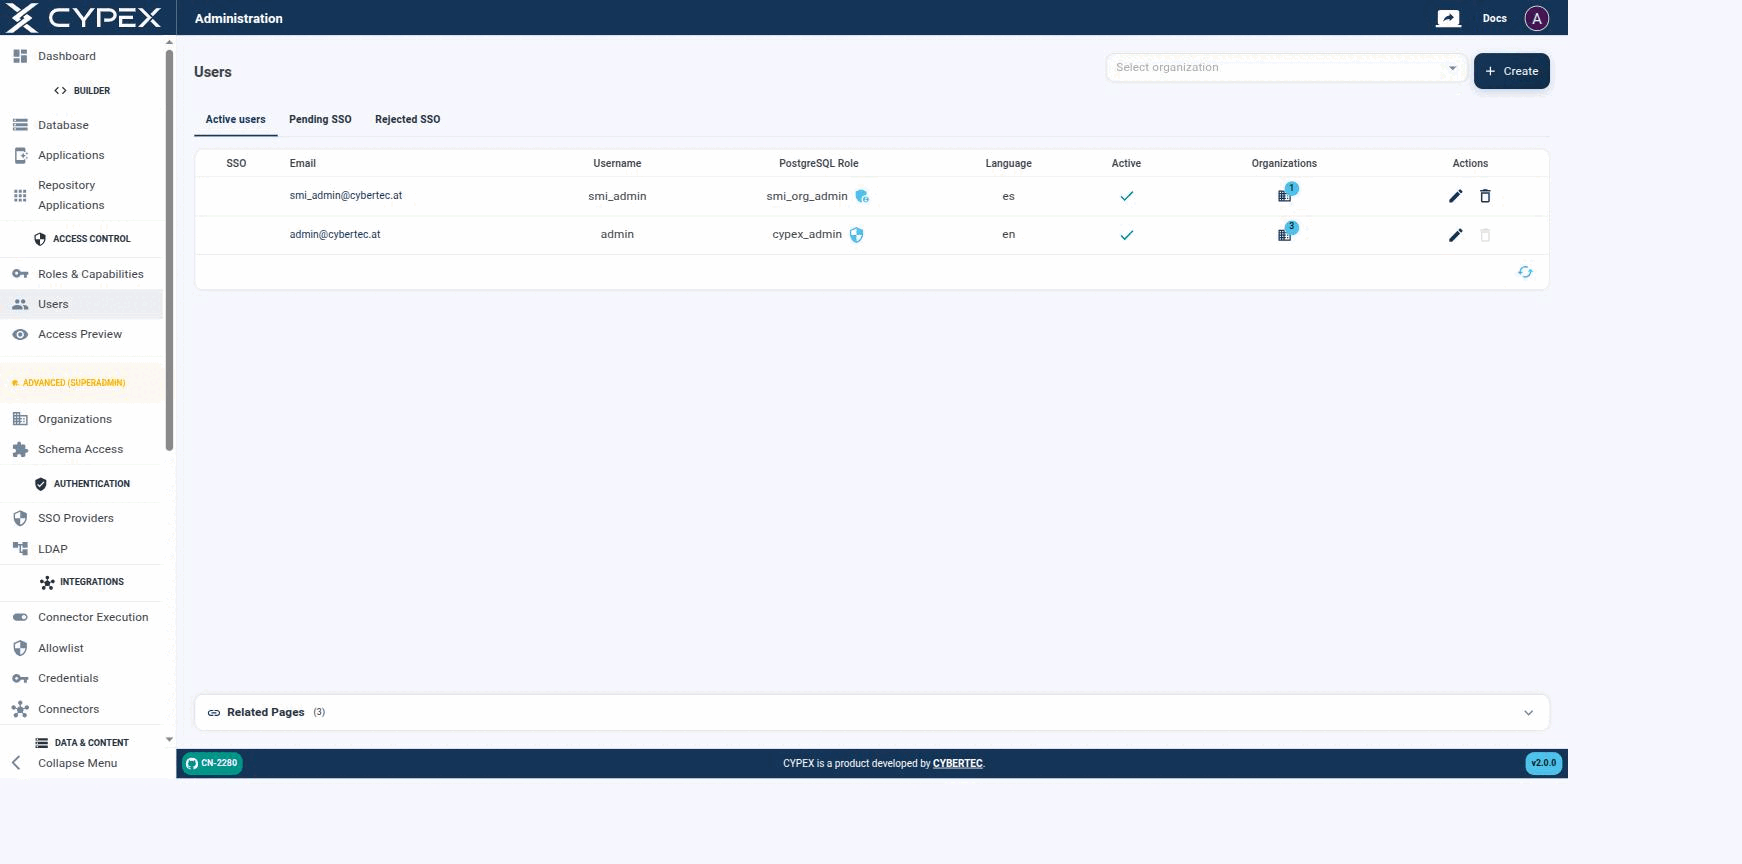
On the CYPEX side, users and roles are mapped to “login names”. This is done in the Users section of the admin panel:
Users
Active users, Pending SSO, and Rejected SSO tabs. Each row shows the PostgreSQL role, language, active state, and organization membership; use Select organization to filter by tenant.
Info
SSO-specific tabs (Pending SSO, Rejected SSO) and provider configuration are covered in their own section — see SSO Providers for provider setup, and Pending and rejected users for the full state diagram, admin approve/reject/un-reject actions, and audit trail behind these two tabs.
Also note that users are mapped to a database role. This is important, since the database role is what controls access to data — both what a user can do (capabilities) and, since v2.0.0, which organizations they can access. The login name (= email) is merely intended to handle CYPEX logins; permissions to data are managed on the lowest possible level (= PostgreSQL) to ensure consistency between the API, the app, and direct database access.
This page describes the v2.0.0 role model and how roles, JWTs, and RLS
policies work together to enforce multi-tenant isolation.
Role summary
All three roles are created as NOLOGIN group roles. Humans (and the
authenticator pool) log in as other roles that are granted
membership in these groups — they never LOGIN as cypex_admin,
cypex_user, or organization_admin themselves.
This page is the admin-panel walkthrough: where each dimension lives in the GUI, and how they combine at query time. For the full conceptual write-up (JWT claims, RLS SQL, the roleType API contract), see Capabilities vs Data Scope under Organizations.
The v2.0.0 access model has two independent dimensions. A request only returns rows when both agree:
Dimension
Question answered
Where it’s configured
Capabilities
What is this user allowed to do?
PostgreSQL role grants (SELECT/INSERT/UPDATE/DELETE, EXECUTE)
Data Scope
Which rows is this user allowed to act on?
Organization assignment + Row-Level Security
A role with broad capabilities but no organization mapped sees no tenant rows. A role mapped to an organization but with read-only capabilities sees all of that organization’s rows but can’t change them. Neither dimension substitutes for the other.
The v2.0.0 upgrade installs a default password policy by inserting a
row into cypex.t_config with key password_policy. This page documents
the policy, how to verify it on your instance, and how to override it.
This is very permissive by design. The rationale is that shipping a
working default is preferable to locking existing users out at upgrade
time. Once the upgrade is complete, administrators should review the
policy and tighten it to match their security requirements.