The next big feature of CYPEX we want to focus on is the ability to upload files. Files are stored in the database. Storing files in the database has always been controversial. However, in this case it is done to ensure that all data including the application itself can be saved using standard PostgreSQL backups. There is no need to back up the database, the application, and those files separately — everything is in the same backup. In addition, files are handled in a transparent manner which brings countless advantages if you are dealing with workflows.
A high level of protection must be assured of your data. We put great emphasis on security, and ensure that data is protected at all times. As part of that, our user management is based on a solid, well-tested user concept.
Understanding the CYPEX user concept
The first question we have to answer when talking about security is: “What is a user?”. Having a clear picture in mind is important to understand the big picture.
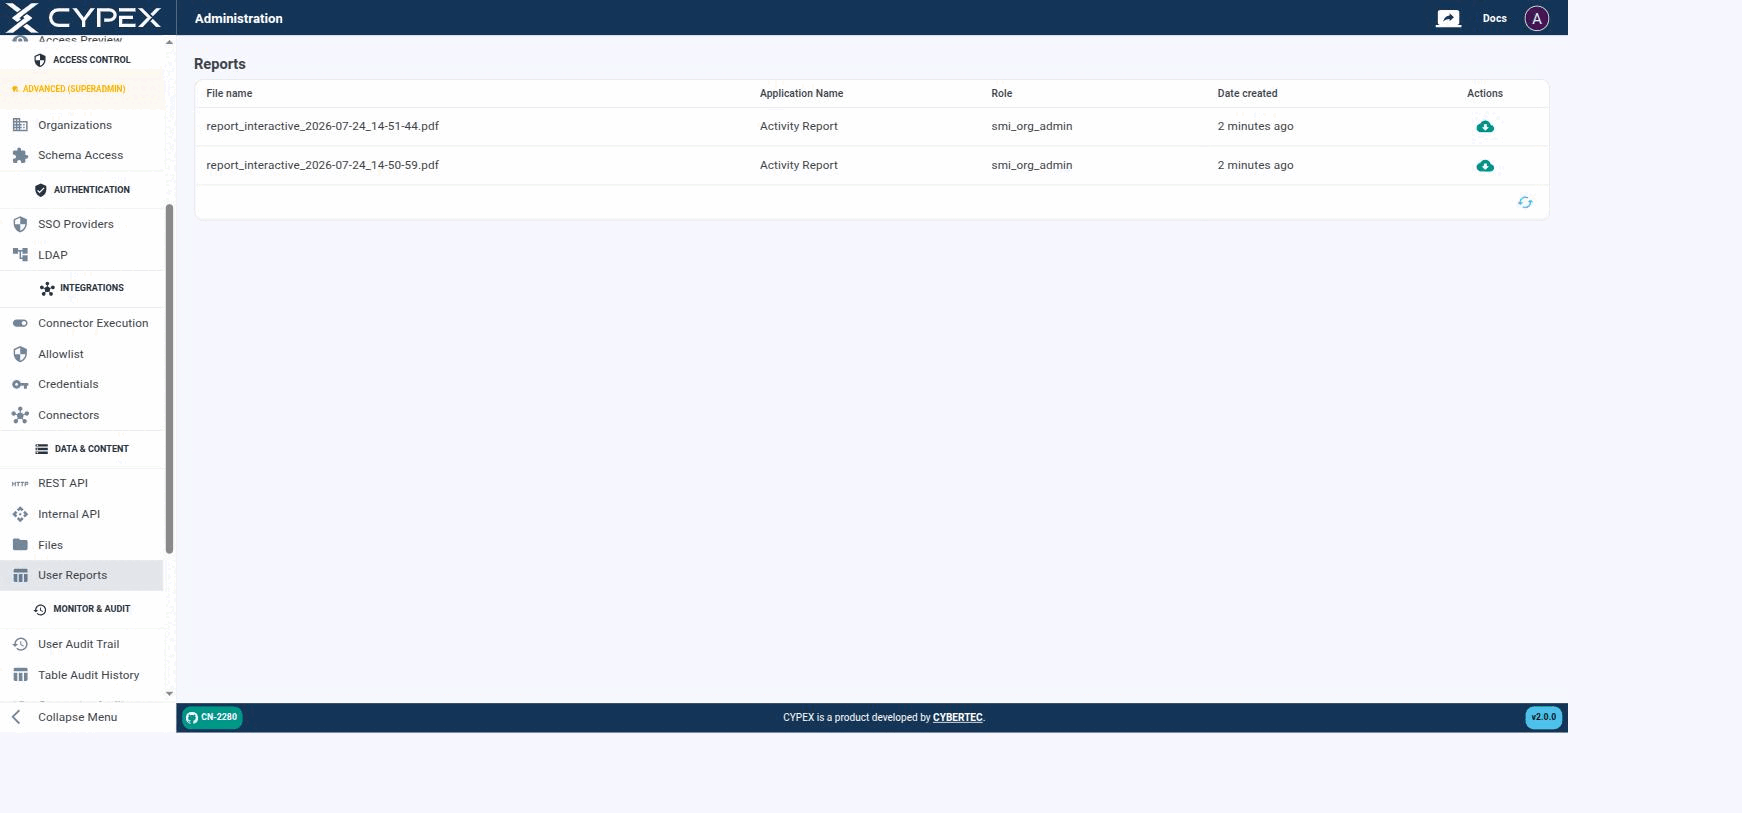
Under Data & Content → User Reports, the admin panel lists every PDF report generated by a CYPEX application — both interactive reports (rendered from a live page view) and static reports (LaTeX-based), as described in PDF Reports:
Reports
Each generated report shows its File name, the Application Name and Role that produced it, and when it was created. Click the download icon to retrieve the PDF.
Reports are stored in the database — like Files, this keeps them inside the same PostgreSQL backup as the rest of the application, with no separate file-storage backup to manage. The Role column reflects who generated the report, which is useful when auditing who requested what.
CYPEX allows users to audit tables and to keep track of login activity. Both live under Monitor & Audit in the admin panel, as two separate entries: Table Audit History and User Audit Trail.
For the enablement path and how row images land in cypex.t_history, start at History Tracking. Permission and organization decisions are a separate stream — see Governance evidence.
Table Audit History
When a table is audited (see Database — Auditing), its change history shows up here. Filter by schema and table using the dropdowns at the top right:
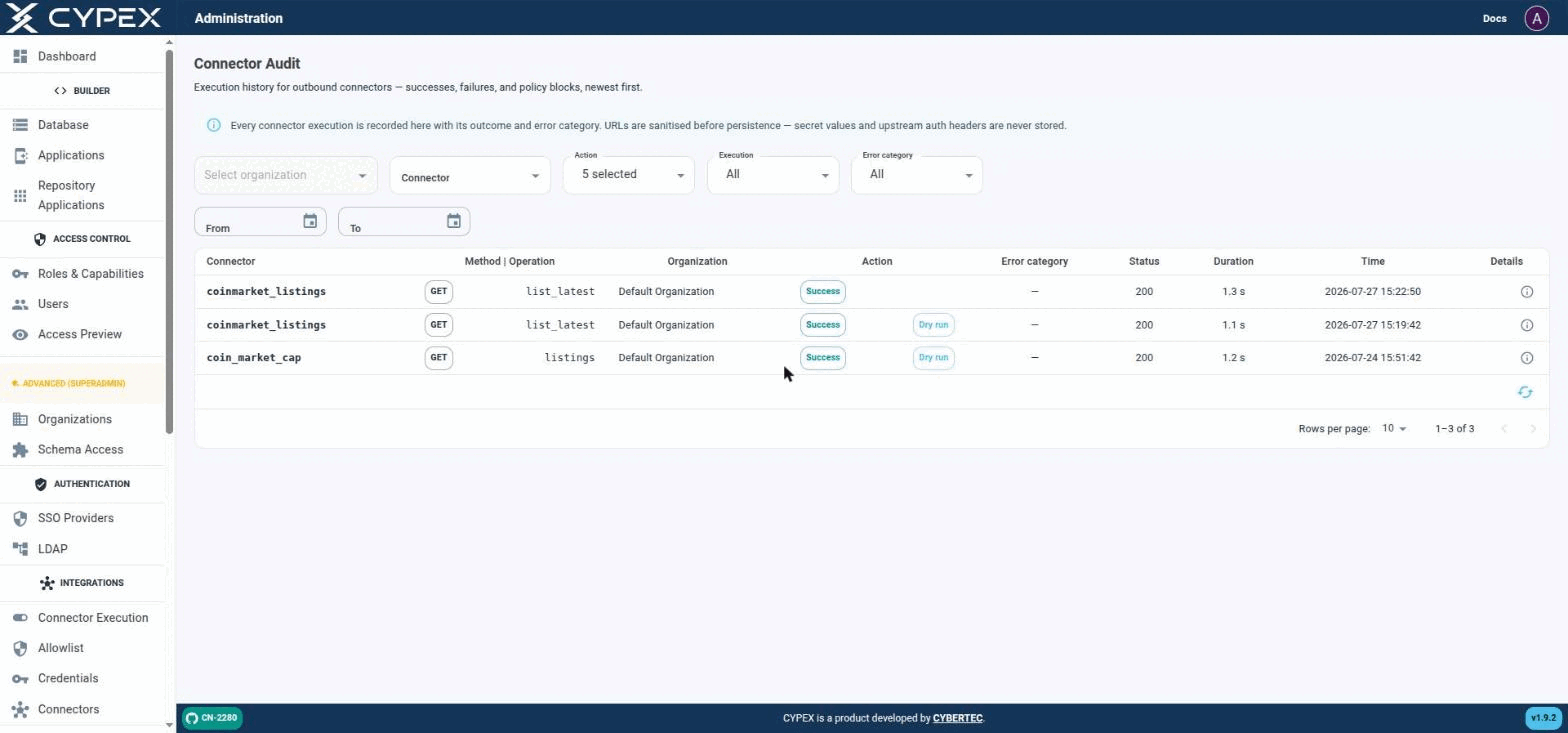
Under Monitor & Audit → Connector Audit, this page is the execution history for outbound connectors — successes, failures, and policy blocks, newest first:
Connector Audit
Live executions (no tag) sit alongside Dry run executions from the builder's Fetch sample / Test response mapping. Both are the same audit trail, distinguished only by the Dry run tag.
Filters
Organization — scope to one tenant.
Connector — scope to one connector definition.
Action — one or more of EXECUTE_STARTED, EXECUTE_SUCCESS, EXECUTE_FAILED, EXECUTE_BLOCKED, EXECUTE_RETRIED, EXECUTE_TIMEOUT.
Execution — All, Live, or Dry run. Dry run covers both the builder’s Fetch sample step and Test response mapping; Live covers real POST /connectors/:id/execute calls.
Error category — filters to one of the categories in Connectors — explicit security boundaries: configuration, schema_validation, policy_block, secret_unavailable, provider_error, timeout, internal.
From / To — date range.
Row details
Each row shows Connector, Method | Operation, Organization, Action (Success/Blocked/etc., plus a Dry run tag when applicable), Error category, Status (HTTP code), Duration, and Time. Click the Details icon for the full record:
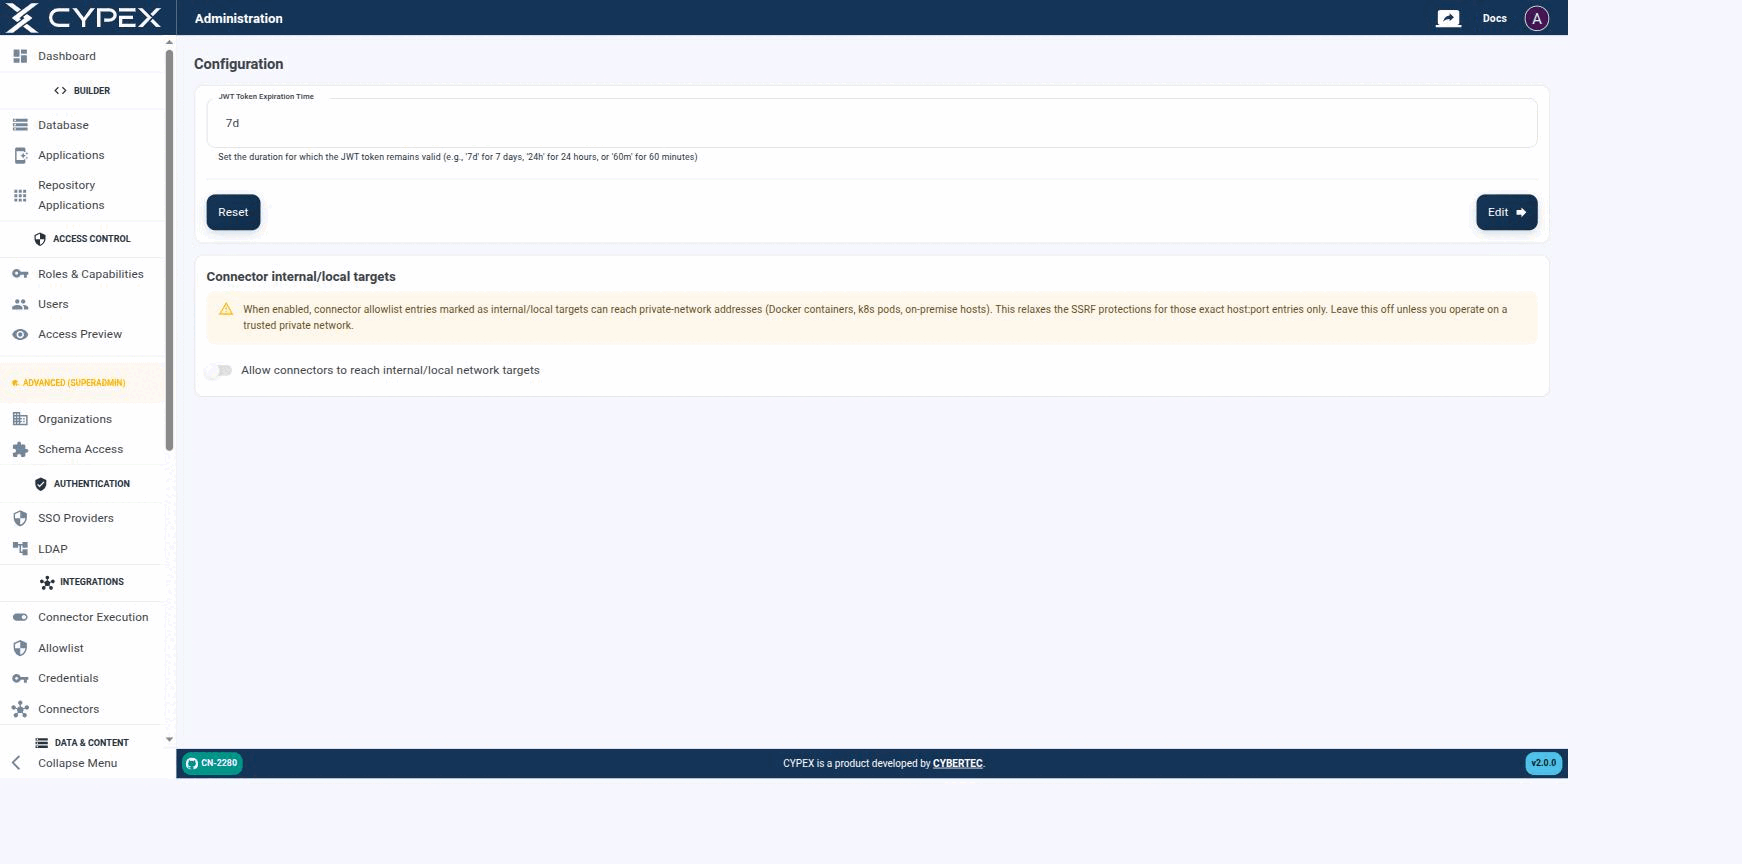
Configuration lives under Platform Admin and holds instance-level settings — these apply to the whole CYPEX deployment, not to a single organization:
Configuration
Session length and Connector internal/local targets are the two instance-wide settings exposed here.
Session length
Sets how long a session stays valid before the user must sign in again, using a duration string — 7d for 7 days, 24h for 24 hours, or 60m for 60 minutes. Click Edit to apply the value shown in the field, or Reset to restore the previous value. It writes cypex.t_config.jwt_exp.
v2.0.0 replaces the single long-lived JWT with an access token / refresh
token pair. This page explains the model, the settings that govern it, and
the two configuration mistakes that break a deployment.
Why it matters
Under the old model a token was minted at login and stayed valid for its whole
lifetime. Deactivating a user or changing their role did nothing until that
token expired — potentially days later.
Platform Admin → Database Migrations is the in-app runner for CYPEX’s own
framework schema migrations — the changes CYPEX applies to its internal
cypex schema when the platform is upgraded.
This screen is System Administrator only (system admin visibility).
Info
This is not where you migrate your data model. Changes to your own tables
are made in Database.
Relationship to the upgrade guides
The in-app runner applies migrations. It does not tell you whether it is safe
to apply them, what they change, or how to verify the result — that is what the
upgrade documentation is for. For v2.0.0 specifically, run the upgrade from
Upgrade to v2.0.0 and treat this screen as
one step inside that procedure, not a substitute for it.
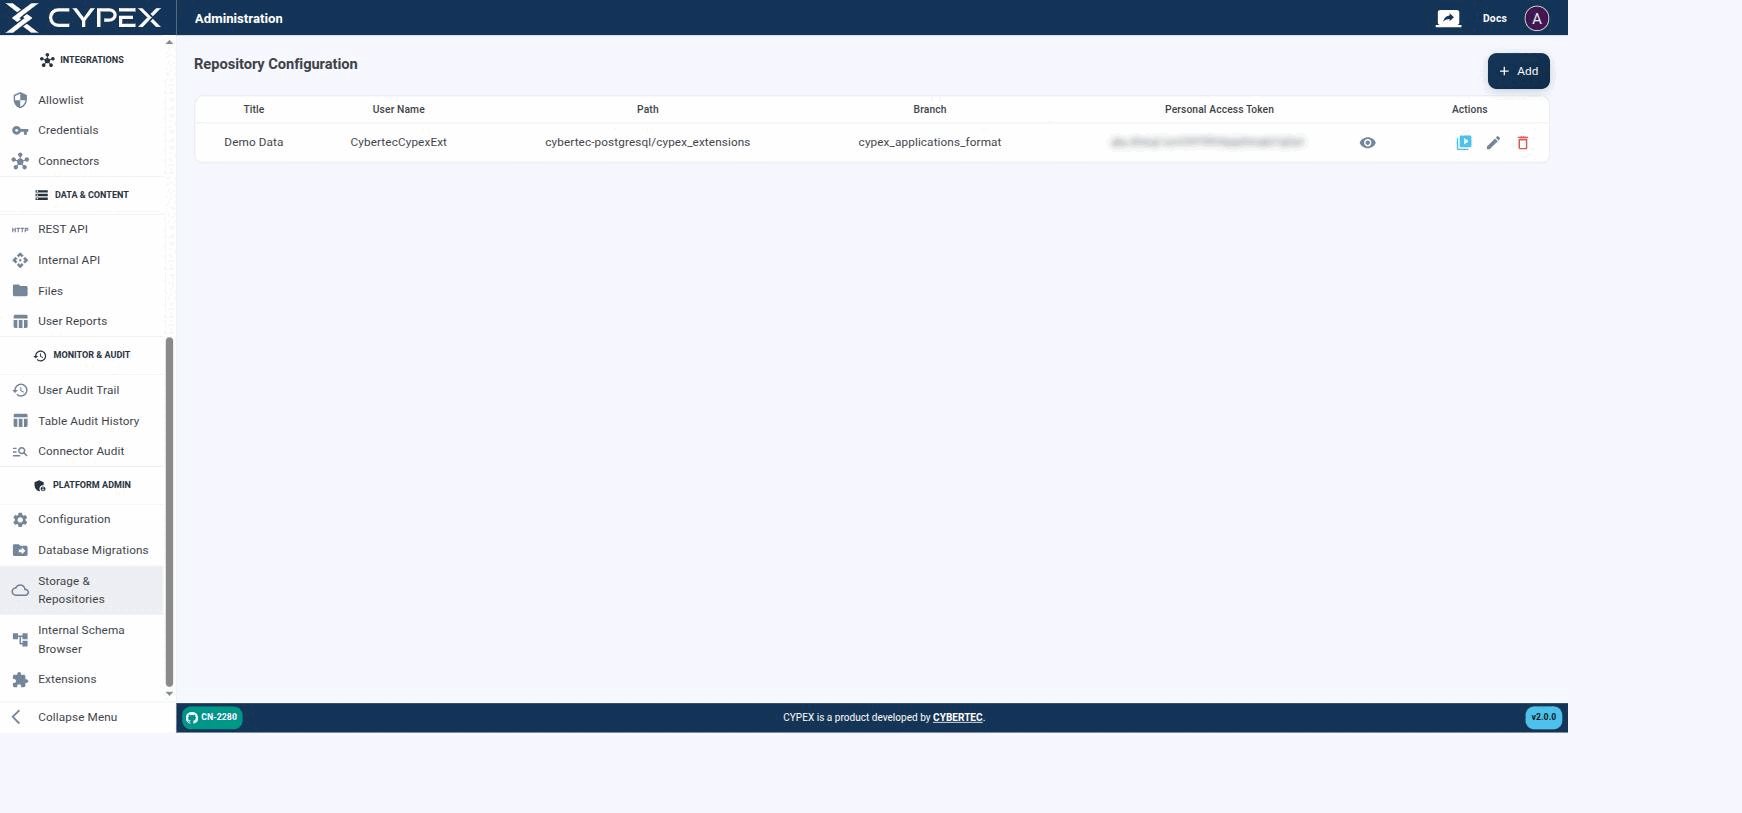
Under Platform Admin → Storage & Repositories, you define the Git repositories CYPEX uses to fetch extensions. Basically, you give CYPEX access to a Git repository which contains all of the extensions in a format accessible to CYPEX:
Repository Configuration
Configured repositories list their Title, User Name, Path, Branch, and a masked Personal Access Token. Actions let you test the connection, edit, or delete a repository.
The configuration is straightforward — add the Git data and test the connection. CYPEX is then fully connected and you can easily add extensions to the system as needed. Click + Add to open the form: